


 1) Preparation, preparation, preparation -- One thing that cannot be emphasized enough is that you must take proper preparation if you want your food photography to come out looking good enough to eat. After selecting the dish you want to capture, go out and purchase the freshest and best looking ingredients for its preparation. Clean any fruits and vegetables well, making certain that no dust, dirt, grime, or discolorations show. Pick up some extra clear vegetable oil as well -- it might come in handy later.
Back at home, decide where you're going to be doing the photography and set up appropriate lighting rigs and gear. Polish any tables, thoroughly clean any plates, bowls, or silverware, and make certain that any placemats or decorations are clean and well-presented.
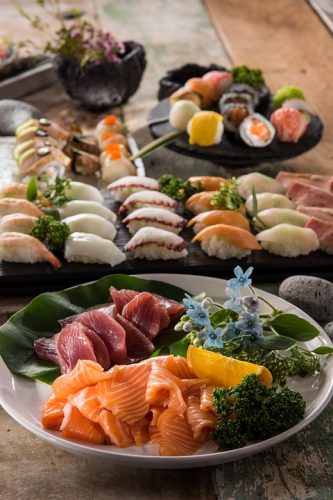
2) Think about colors and contrasts -- Pick out dishes that will work well with the setting. If you're using a dark-colored table, consider using white dishes in order to bring out the contrast. If your table is clear glass, use dark colored dishes.
3) Photograph each stage -- Some of the best photos might come from the prep work for the meal or even while it's cooking. Keep your camera handy and keep a dishcloth nearby to wipe up spills and splatters.
4) Keep some extra raw ingredients to the side -- Cooked vegetables, especially if they've been boiled, lose a lot of the qualities that make them photogenic. Keep some raw ones to the side to use as decoration either in or next to the dish.
1) Preparation, preparation, preparation -- One thing that cannot be emphasized enough is that you must take proper preparation if you want your food photography to come out looking good enough to eat. After selecting the dish you want to capture, go out and purchase the freshest and best looking ingredients for its preparation. Clean any fruits and vegetables well, making certain that no dust, dirt, grime, or discolorations show. Pick up some extra clear vegetable oil as well -- it might come in handy later.
Back at home, decide where you're going to be doing the photography and set up appropriate lighting rigs and gear. Polish any tables, thoroughly clean any plates, bowls, or silverware, and make certain that any placemats or decorations are clean and well-presented.
2) Think about colors and contrasts -- Pick out dishes that will work well with the setting. If you're using a dark-colored table, consider using white dishes in order to bring out the contrast. If your table is clear glass, use dark colored dishes.
3) Photograph each stage -- Some of the best photos might come from the prep work for the meal or even while it's cooking. Keep your camera handy and keep a dishcloth nearby to wipe up spills and splatters.
4) Keep some extra raw ingredients to the side -- Cooked vegetables, especially if they've been boiled, lose a lot of the qualities that make them photogenic. Keep some raw ones to the side to use as decoration either in or next to the dish.
 5) For salads or vegetable dishes, use oil -- You can make your vegetables glisten and shine with a light application of oil. The skin of most foods is not very reflective; vegetable oil lightly brushed onto them can change that, making for some mouth-watering photos.
6) Be ready to get upset for meat dishes -- Photographing meat dishes like roast beef, steaks, hamburgers, fish, pork, and more can be very frustrating as meat is not very photogenic before it is cooked or after. It not only takes an artist's eye to arrange a meat platter in a pleasing manner, it requires patience and practice to set up the lighting and deal with meat's natural textures, oils, and fatty portions in a photography setting.
Photographing food can be very rewarding but it requires a lot of preparation and set up in order for it to come out well. Follow the tips above and you can get the most from your meals, not only in nutrients, but in photographs, too.
-- da Bird
5) For salads or vegetable dishes, use oil -- You can make your vegetables glisten and shine with a light application of oil. The skin of most foods is not very reflective; vegetable oil lightly brushed onto them can change that, making for some mouth-watering photos.
6) Be ready to get upset for meat dishes -- Photographing meat dishes like roast beef, steaks, hamburgers, fish, pork, and more can be very frustrating as meat is not very photogenic before it is cooked or after. It not only takes an artist's eye to arrange a meat platter in a pleasing manner, it requires patience and practice to set up the lighting and deal with meat's natural textures, oils, and fatty portions in a photography setting.
Photographing food can be very rewarding but it requires a lot of preparation and set up in order for it to come out well. Follow the tips above and you can get the most from your meals, not only in nutrients, but in photographs, too.
-- da Bird