


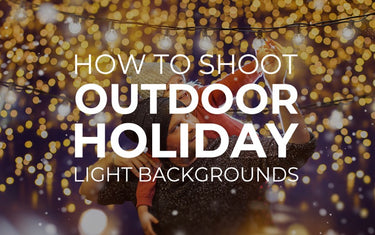

Holiday season is finally here and that means you’re going to be around family, friends, eat tons of your favorite holiday foods, hang decorations and lights, and of course receive and give the perfect gifts. This is a time to create memories with the people you hold closest to your heart and enjoy life. It is also a time when there will be loads of photographs being taken.
Achieving terrific holiday pictures is very important. You’re going to want to capture all the amazing moments between all the relatives and friends you may have not seen in a while, all the festive foods and the beautiful holiday ornaments and decorations. However, photographing Christmas lights and holiday decorations can be challenging because of the mixed dark and bright lighting conditions. This type of environment makes it difficult to find the perfect balance of light exposure for your pictures to produce a clean focused image that highlights the subject in a flattering way while still showing the eloquence of the holiday light backgrounds.
Gear
Although they’re awesome, smartphones for this photoshoot simply won’t be able to get the job done well. With the right tools, shooting in a difficult lighting environment will be a lot easier and produce exceptionally timeless pictures to share with your family and keep forever. You won’t need a ton of equipment, just the right equipment. And for those who are new to photography, or looking to upgrade their photography gear, now is the best time to shop the top brands in optical technology like Nikon, Sony, Canon, Sigma, and Tamron because of the holiday deals.
- Mirrorless or full frame camera – These types of cameras have powerful sensors and processors which have great sensitivity to light, allowing the camera to produce clearer more vivid pictures, even in low light environments. Plus, they have powerful exposure and focusing auto features which will remove the stress of having to adjust your settings a million times.
- A compatible wide angle zoom lens – This is the perfect lens for capturing a landscape portrait of your family in front of a holiday display of lights or Christmas tree background.
- A compatible Telephoto lens – A wide angle zoom lens will do the trick but if you want to get closeups of decorations from a distance (such as the top of a huge Christmas tree) or solo portraits, a telephoto lens is a nice thing to have in your gear bag.
- A tripod – When shooting in tough lighting conditions and when time is of the essence, you must have a tripod. It’s the only way to keep the camera completely still and achieve focus on your subject and all those little decorative lights in the background.
When is the best time to take photographs with holiday light backgrounds?
At twilight. This is when the lower atmosphere is illuminated by scattered and refracted sunlight which creates an atmospheric phenomenon of colors. This is the perfect lighting environment to shoot holiday decorations and people. Shooting when its too dark outside will make it almost impossible to capture the right exposure for both your subject and a background lit up with holiday decorations. This can result in the subject looking flat of color with over exposed lights or a dark silhouette with floating decoration lights in the background.
Shooting at twilight provides the perfect balance of light to capture both the subject and the decoration light background properly, but you will have to act fast as the lighting conditions will change with every minute that passes. Therefore, it’s important to map out your vantage points and check your frame of composition in advance so you’re ready to shoot as soon as the outdoor Christmas lighting conditions are met.
Exposure settings
On to the nitty gritty part of photography and the topics new photographers tend to avoid, the camera’s lighting and exposure settings. It’s funny because understanding how these settings work will greatly increase your skills and open doors for new photographing possibilities.
There are 3 camera settings that affect exposure. ISO, shutter speed, and aperture. Many photographers will be reliant on their cameras auto exposure features, but by understanding this triad of exposure settings, you will be able to take full control of your camera and achieve the maximum potential for your shot.
ISO is often referred to as the meter that gauges the cameras sensitivity to light, but it also has a factor in the actual quality of the image. Turning your iso up all the way will brighten your image but also reduce the quality resulting in a grainy looking picture. An ISO set at its lowest setting will give you a much darker image but also maintain the pictures highest quality.
For shooting outdoor holiday lights as backgrounds an ISO setting of about 400 should do the trick. If your shots are coming out too dark, you can always increase it. If you’re using a tripod, you may want to begin with ISO at its lowest setting and increase slightly until you find the perfect sweet spot between the ISO, shutter speed, and aperture. Remember that these three settings go hand in hand, so adjusting one will affect the other two.
This setting should be simple to understand. It defines the amount of time the cameras shutters are open. For this photoshoot, you should be using a low shutter speed. If you feel like you need more light, you can slow down your cameras shutter speed which will leave the shutter open longer thus allowing more light to reach the cameras sensors. This is an ideal method when you’re photographing a Christmas tree with all its ornaments and lights.
A longer shutter speed will be sensitive to any movement within your frame, so if you’re not using a tripod, or when you are adding people to your photograph, it’s important to keep this in mind. Camera shutters that are opened for too long can cause a trailing effect which would be unwanted when shooting outdoor Christmas photographs.
Aperture
The final component of the triad of exposure settings is your cameras aperture. This measures the size of the opening in the lens and works just like the pupils in your eyes. It’s easy to be confused because the lower the aperture number, the larger the aperture is. And vice versa the greater the number, the smaller the aperture is.
Aperture is a great way to increase light exposure to your camera and greatly affects your photographs depth of field which can allow you some control over the sharpness of your photo going from foreground to the background. To find your perfect aperture setting, you may want to begin somewhere around f/8 and adjust as necessary in conjunction with your ISO and shutter speed.
To create a dreamy appearance of your subject over a blurry background full of holiday lights you will need to understand how to adjust your aperture. Simply put, the larger the aperture is (low setting), the blurrier the background will become. The smaller the aperture is (high setting), the less blurry the background will become. So, if you want everything perfectly in focus, you will need to balance your exposure settings with a high aperture setting. If you’re trying to achieve a more artistic result with a focused foreground over a slightly blurry background, you will need to balance your exposure settings with a low aperture setting. This is a common trick to get your subject to pop and glow over a slightly defocused background.
Go with haste, but never be in a hurry
When shooting your Christmas lighting photography, the most important thing to do is to stay relaxed but know you may only have a few moments to get the perfect shot. Preparation and practice will play a major factor in your chances of success. Do a mock photoshoot ahead of time to figure out all the details, meaning when, where, and your cameras settings. This also gives you a chance to think about your subjects and create the scene. Don’t set your expectations too high if you have never done this before as it takes practice. Just try to make every picture better than the last, enjoy your photography creations, and have fun.
