


The Ferris Wheel at Night
To photograph a Ferris wheel at night, move close and use a wide-angle lens from Beachcamera.com to get as much detail as possible. Place your camera on a tripod and frame the image. Because you want all the elements to be sharp, choose a small aperture between f/11-f/32. Set your camera to either Manual or Shutter Priority mode and select a shutter speed according to the speed of the lighted Ferris wheel, and the style you are after. Anywhere between 1-30 seconds. You should take the image using the camera’s self-timer or a wireless remote shutter release so that you avoid touching and jiggling the camera. The image captured will be full of light trails against a black sky, yet the center beams that hold the wheel will be sharp.
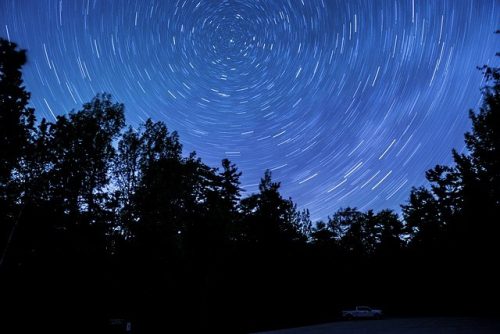
Making Star Trails
A long exposure on a starry night can produce beautiful light trails created by the stars and the rotation of the earth. The best way to frame the image is to include an element of interest such as a tree in the foreground. Place your camera on a tripod from Beachcamera.com and focus the lens to infinity. You’ll want to use a remote shutter release to eliminate camera shake of any kind. Set the camera to B “Bulb” shooting mode and set your aperture between f/2.8 – f/4 for optimal results. Depress the remote to open the shutter. You should keep your ISO at 100 to keep the digital noise at a minimum. To complete the photo after your desired elapsed time, depress the remote again, and release the shutter. These exposures can be 15 minutes to several hours long.
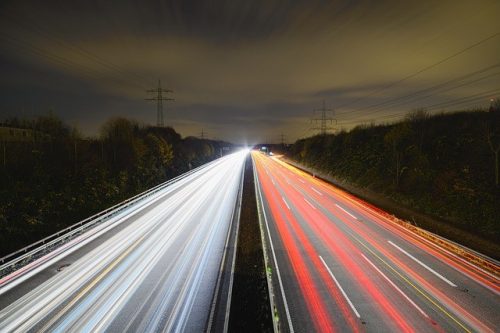
Stunning Light Trails
Traffic head light and tail light trails give a stunning effect . It is a great way to get acquainted with long exposure times. Select a busy road that has lots of traffic at night. Use a sturdy tripod and position the camera so that it has an overview of the area. Use a small aperture of f/16 or smaller for a greater depth of field, making most of the image in focus. The longer the exposure, the more lines will appear and the longer they will look.
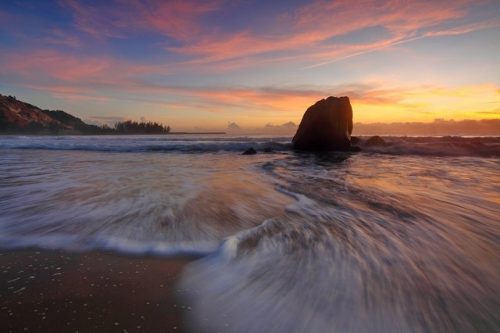
Blurry Sea Waters
To capture that dramatic look of the ocean and the sky, you should utilize the light of the golden hour. The last hour before the sun sets. Follow the basics of night photographY. Place the camera on a tripod, use a wide-angle lens with the smallest aperture possible, and focus to infinity. Turn the camera’s mode dial to Manual or Bulb shooting mode and use a slow shutter speed, 5-30 seconds, for a longer exposure. The longer the exposure, the mistier the water appears. Use your camera’s self-timer or a remote shutter release to take the photo with absolutely no blurring. Don’t use flash because it could ruin the effect in the image. What makes long exposure images unique is that each image is unique, since light trails move in unusual ways. With practice, you should have a collection of photos that are truly one of a kind.