


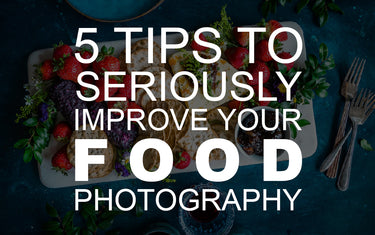

Let There be Light
Natural lighting is one of the most important aspects of food photography. Natural light enables the true color of the food to show through. While sunlight is natural, you want to avoid direct sunlight because that will cause harsh shadows. To make the direct lighting softer on your subject, try diffusing it with a thin curtain or window blind. The best option is to shoot your photos near a large window and to shoot during daylight hours to get as much natural lighting as possible. If you need to use artificial lighting, try to avoid regular household lights, such as fluorescent and incandescent bulbs. Instead, try to use studio lighting that attempts to mimic soft, natural light.

Find the Right Angle
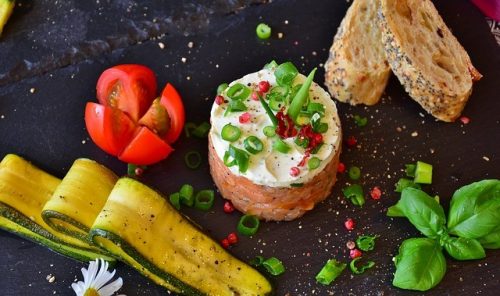
Play around with angles. Shooting from a lower angle can create visual interest in the food. Shooting from a lower angle with your Tamron zoom lens from Beachcamera.com enables you to see the thickness of the food, different layers and the sides of the food. This technique also mimics the perspective we all have when sitting at a table about to eat. So it makes sense this would be an appealing angle. Shooting from an even lower angle and looking up to the food creates more of a grand presence as well. Shooting from above, or from a “bird’s-eye perspective,” works very well with food such as soups, mashed potatoes, and cookies. This angle allows you to see inside deep bowls and get more into the shot

Play with Colors, Shapes and Textures
Changing the shapes, colors and textures of a plated meal or food item will dramatically enhance the way the food is perceived. Try to avoid using similar-colored foods on the same plate. Also, use a contrasting color plate or utensil to help add interest to the picture. A white plate is typically a safe choice. It will allow the food to shine. This is the beauty of garnishes. A bland, plain plate of food will look more elegant and interesting with the simplest of garnishes. Try using fresh herbs, like parsley, rosemary, basil or mint to make the food pop and to subtly remind the viewer what may be in the recipe. For example, use a sprig of mint to garnish some fresh mint lemonade or some basil with your chicken cacciatore. Garnishes are an inexpensive way to dramatically change your food photography and add visual interest to your plating. Add texture to your photo by adding in napkins, forks or even sprinkling ground nutmeg or grated parmesan cheese. All of this works to make the composition more interesting.
Adjust Your Camera Settings
This is where a DSLR and a quality camera lens from Beachcamera.com come in very handy. Understanding your camera settings is extremely important as a photographer. Being able to adjust simple factors like white balance, f-stop, ISO, shutter speed, and aperture make a huge difference in the overall appearance of every shot you take. Once you understand the relationship between all the settings and how they affect the shot and lighting, your photography will improve dramatically. Shoot in Manual mode to have total control over all the settings. If that’s too daunting, start with Aperture-Priority mode which automatically makes adjustments based on your aperture setting. Try to avoid using Auto mode because you want to control the picture, not have your camera control it for you.
Use Exposure Compensation
Get to know your exposure compensation button on your DSLR camera. Exposure compensation allows you to increase or decrease the amount of light being shown, or exposed, in the shot. This is a feature that can and should be played with for every shot, depending on the lighting, time of day, shadows, orientation, etc. This handy little button will make a huge difference in your photographs. This is a quick trick that will revolutionize how you shoot food photos. It will allow you to increase and decrease lighting without fully understanding all the settings of your camera. Applying these 5 food photography tips will result in drool-worthy results!