


Choose your Subject

First and foremost, you have to decide what type of animal photographer you want to be, as this will determine what gear you invest in and how you approach your shots. While many of these tips work across the board for photographing living subjects, some things like using weatherproof lenses are only really necessary if you’re going out into the wild to photograph animals. Pet photographers benefit from the comfort of their own living room. In general animal photographers can be grouped into 5 distinct categories: pets, wildlife, aquatic life, birds and insects. We’ve separated out birds from wildlife purely because bird-watching is a popular hobby you can participate in your own backyard.
Use the Right Equipment for the Job
If all you want to do is photograph “Fluffy” on your new obstacle course, you’re in luck because all you’ll need to take high quality photos of your pet is a DSLR camera and the right lens. The one caveat of course is maybe a speedlight, which you can point directly towards the ceiling or use with a diffuser to combat poor indoor lighting. For anything outdoors, you’ll probably want the right equipment. Here’s a nice handy outdoor list to help you pack light and pack right.- Binoculars
- Waterproof camera bag
- Telephoto Lens (Wildlife is shy!)
- Macro Lens (For Insects)
- Tripod
Choose the Right Focal Length
When photographing wildlife, it often helps to use a telephoto lens, to put some distance between yourself and your subject. This is mainly for the obvious reason that wild animals like moose, deer or birds tend to be shy around humans and will flee at the slightest inkling of your presence. Lenses are expensive, and it helps to know which focal length to invest your money in. It turns out that many wildlife photographers stand by the 400mm focal length. It will help you achieve the right angle of view to capture stunning wildlife photography. It’s long enough to main a respectable distance from your subject but close enough to force you to learn how to approach wildlife carefully. If you’re photographing a pet, you can take advantage of that intimacy by taking stunning close-ups with a 50mm lens.
Pay Attention to Lighting
The fabled golden hour, the first and last hour of light during a day, is coveted by photographers for a reason—it casts a soft diffused light over the subject at just the right angle to ensure even illumination. The sun at high noon has a tendency to cast dark shadows that can ruin a photo because of how they happened to fall upon the animal at that particular moment (e.g. a buck and his antlers). In general you always have to be mindful about the position of the sun relative to your subject, and this holds true for all photography. If you’re going to take advantage of the golden hour, keep in mind that you’ll have to rise early enough to track the animal, set up your scene, adjust your shutter speed and write a book.
Taking Close Ups

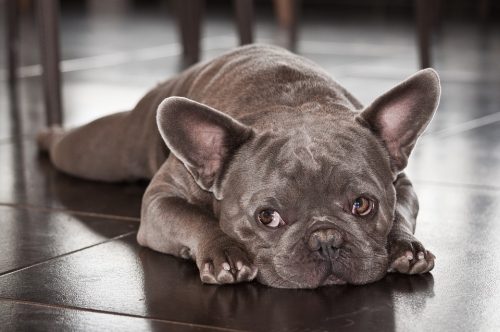
A favorite photo among any animal lover is the close-up—personal, intimate, with the subject sharp and in focus. The easiest way to achieve this on your DSLR is to use aperture priority mode with a wide aperture lens. A fast prime lens with an f number around f/1.4 to f/2.8 will place emphasis on your animal while the background is relegated to a blur. For best effect make sure that there is significant distance between your pet and the background, the further away the better the blurred background effect, the wide aperture will take care of the rest. Placing distance between you and your pet can also bring the subject into focus.
